
Selling a House With Tenants in New Jersey: How to Prepare It for Photos and Showings

Home TENANT-OCCUPIED NEW JERSEY Selling a House With Tenants in NJ: How to Prepare It for Photos and Showings Selling with tenants in place takes more coordination than a typical listing. The practical question for staging is simple: how do you prepare the home for photos and showings while someone still lives there? StageIT Staging Team . October 2026 . 11 min read Get Free Estimate KEY TAKEAWAYS The short version A tenant-occupied home can be listed and sold—selling doesn’t automatically end the tenancy. Occupied staging works within the tenant’s furniture and agreed changes—never removing belongings without permission. Start with the lease and tenant coordination before scheduling photos or showings. This is staging guidance, not legal advice—check NJ law and the lease with a qualified attorney. Selling a house with tenants requires more coordination than a typical listing. The landlord or listing agent needs the property ready for photos and showings while the tenant continues living there day to day. The key is to plan around both the property and the occupancy situation. Important factors include what the lease says about entry and showings, how much access and cooperation can be coordinated with the tenant, the current condition of the rooms and furniture, the timing of listing photography, and whether the property will remain occupied during marketing or become vacant. Staging guidance, not legal advice This article focuses on property presentation. Access, notice requirements, and tenant rights depend on applicable New Jersey law, the lease, and the circumstances. Consult a qualified New Jersey real estate attorney before making decisions about disputed access, ending a tenancy, or promising vacant possession. FIRST QUESTION Can You Sell a House While Tenants Still Live There? Yes. A tenant-occupied property can be listed and sold, and buyers regularly purchase rental properties with tenants still in place. What happens to the tenancy after a sale is a separate issue, and it can depend on the existing lease terms, the property type, the timing of the sale, and applicable New Jersey landlord-tenant law. Do not assume that listing or selling the property automatically ends the tenant’s occupancy. If the tenancy could affect the sale timeline or closing strategy, discuss the situation with a qualified New Jersey real estate attorney. From a staging perspective, the practical question is different: how can the home be prepared for listing photos and showings while the tenant is still living there? That’s the focus of the sections that follow. STEP ONE Check Your Lease Before Planning Showings Before scheduling a photographer, stager, or showing, start with the signed lease. Lease terms can vary in how they address landlord access, advance notice, photography, and entry related to a sale. Review the lease for clauses covering: Landlord access and notice requirements Entry for purposes other than maintenance or emergencies Photography or video inside the property Showing times or access restrictions Any terms related to selling or marketing the property For sales showings, do not assume there is one notice rule that applies in every New Jersey situation—the lease language and the specific circumstances of the tenancy matter. If the lease is unclear, the tenant disputes access, or you’re unsure how New Jersey law applies, seek qualified legal advice before arranging photos or showings. From a staging perspective, the process should begin only after the owner or listing agent has properly coordinated access with the tenant. STEP TWO Talk to Your Tenant Before Anything Else Once you understand what the lease allows, communicate with the tenant early and clearly. Early communication reduces surprises and makes photography, staging, and showing coordination easier for everyone. Confirm in writing: Listing timeline: photography date, when showings may begin, and the expected marketing period. Preparation requests: which areas you’d like cleaned up, edited, or temporarily adjusted. Tenant belongings: what may be moved, who will move it, where it will go, and who restores it afterward. Showing logistics: how appointments are communicated and whether showings can be grouped into practical windows. A request is not a requirement Be careful to distinguish between a request and a requirement. Do not treat staging or presentation requests as automatic tenant obligations. If you’re unsure whether a particular request is enforceable under the lease, seek qualified New Jersey legal advice. SHOWINGS Show a Rental Without Disrupting the Tenant Showing a tenant-occupied property works best when the process is predictable, consistent, and easy to repeat. Rather than relying on last-minute preparation, create a simple routine that works for both the tenant and the listing schedule. Where the lease and tenant arrangements allow, consider grouped showing windows in defined time blocks, consistent advance communication according to the lease, and a repeatable reset routine the tenant can realistically follow before each showing. Simple pre-showing reset Open agreed window treatments for natural light Clear temporary items from counters, tables, and visible floor areas Make beds and straighten soft furnishings Move agreed pet items out of main viewing areas Keep walkways clear and unobstructed SCOPE What Can Realistically Be Staged in a Tenant-Occupied Home Occupied staging starts with the furniture and belongings already in the home. The goal is to improve room function, circulation, and photo presentation without making changes beyond what the tenant has agreed to. A tenant-occupied staging plan may include: Furniture editing and repositioning: adjusting existing pieces to improve flow and room function. Clearer room purpose: simplifying spaces that currently serve several functions. Surface editing: reducing visual clutter on counters, shelves, and tables. Selective staging pieces: adding a small number of items where appropriate and agreed. Existing tenant furniture can often be used if the scale and placement work well. If pieces are oversized, visually dominant, or difficult to reposition, the occupied staging scope may be more limited. Occupied staging respects the tenant’s belongings Occupied staging does not mean removing tenant belongings without permission or trying to make the property appear vacant. In a review, prioritize the rooms and
Staging a Small Bedroom Before Selling: Bed Size, Storage and Clear Walkways
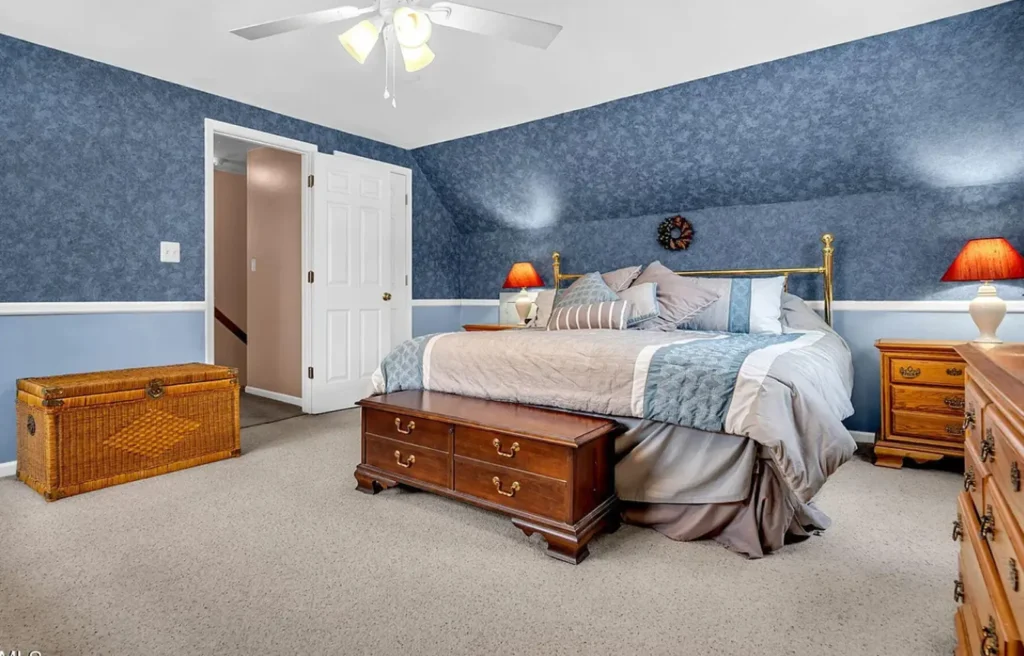
Home SMALL BEDROOMS NJ & PHILADELPHIA Staging a Small Bedroom Before Selling: Bed Size, Storage and Clear Walkways Staging a small bedroom isn’t about faking extra square footage. It’s about making the room’s proportions, function, and circulation easy to understand at a glance. StageIT Staging Team . September 2026 . 9 min read Get Free Estimate KEY TAKEAWAYS The short version The goal is a clear, functional bedroom—not the illusion of a bigger room. Skip perfect symmetry: one nightstand often reads better than two in a tight room. Choose a bed that fits the room’s proportions and keeps doors and closets accessible. Show usable storage by keeping closets clear and dresser tops simple. A small bedroom can feel even tighter when the bed, dresser, nightstands, and storage pieces compete for limited floor space. When buyers look into the room, they should be able to quickly understand that it functions clearly as a bedroom, whether the furniture fits comfortably, and whether there’s enough space to move around. Staging a small bedroom is about making the room’s proportions, function, and circulation easy to understand—not trying to create the illusion that it is larger than it really is. START HERE Decide What the Bedroom Needs to Communicate Before moving furniture, decide what role the bedroom should communicate in the listing. PRIMARY BEDROOM Show clear function Use a bed and supporting furniture that fit the room comfortably and clearly show its function. SECONDARY / GUEST BEDROOM Preserve floor space A smaller bed and simpler furniture plan may help preserve floor space and keep the room’s function clear. In a small room, one clear purpose usually reads better than trying to combine a bedroom, office, and storage area. Once the room’s function is clear, decisions about bed size, dresser placement, bedside furniture, and storage access become much easier. THE MAIN DECISION Choose a Bed That Fits the Room The bed is the main furniture decision in a small bedroom. It should clearly show the room’s function without overwhelming the floor plan or blocking access. Consider: Room shape: a narrow room may need a different bed position than a square room of the same size. Door and closet access: keep enough space for doors to open and for buyers to reach the closet comfortably. Bedroom function: a primary bedroom may support a larger bed than a secondary or guest room. Bed-frame profile: low-profile frames and lighter designs can feel less visually heavy than tall headboards or bulky frames. No single “right” bed size There is no single bed size that works for every small bedroom. The right choice is the one that fits the room’s proportions, preserves circulation, and communicates the intended bedroom function clearly. ACCESS Keep Doorways and Closet Access Clear In a small bedroom, clear access helps buyers understand how the space functions. Focus on: Door clearance: the bedroom door should open freely without hitting the bed, nightstand, or dresser. Closet access: closet doors should open fully, with enough space in front for easy use. Clear walkways: buyers should move from the entry to the bed without squeezing around furniture. Window access: keep windows easy to reach, especially when they’re an important source of natural light. If furniture blocks these areas, reposition or remove the piece causing the problem. Avoid relying on universal clearance measurements—the practical test is whether buyers can move through the room and access its main features comfortably. BEDSIDE Use Bedside Furniture Selectively Two matching nightstands aren’t always the best choice in a small bedroom. If they tighten walkways or force other furniture into awkward positions, use a lighter setup. Options include: One nightstand: useful when only one side of the bed has comfortable access. Smaller bedside pieces: slim tables, stools, or floating shelves reduce visual weight. Minimal accessories: keep surfaces simple so the bed remains the main focal point. Wall-mounted lighting: a useful alternative when bedside space is limited. The goal is not perfect symmetry. It’s to keep the bedroom functional, uncluttered, and easy to move through. STORAGE Present Storage Without Adding Visual Clutter Storage should be easy to understand without making the bedroom feel crowded. Focus on: Dressers and wardrobes: keep pieces that fit the room’s proportions and don’t block circulation; clear the top surface to reduce visual clutter. Closet access: make sure closet doors open fully and the area in front stays clear. Visible contents: edit overfilled closets and open shelving so storage appears usable rather than cramped. Oversized storage furniture: reposition or remove pieces that overwhelm the room or interfere with movement. The goal is to show that the bedroom has practical storage without allowing storage furniture or clutter to dominate the space. For broader cleaning and decluttering guidance, refer to the home staging checklist for NJ sellers. WORKED LAYOUTS Worked Bedroom Layouts: What Changes Before Photography These examples show how furniture scale, placement, and access can change the way a small bedroom reads in listing photos. The layouts are illustrative examples, not verified StageIT US client projects. 1 Oversized bed in a primary bedroom PROBLEM A large bed and bulky frame dominate the room, reduce visible floor space, and make the route to the closet feel tight. STAGING DECISION Use a smaller or lower-profile bed where appropriate, keep bedside furniture aligned with the bed, and preserve a clear path to the closet. Reads more clearly: the bed stays the focal point while proportions, floor area, and circulation are easier to understand. 2 Dresser blocking closet access PROBLEM A large dresser blocks part of the closet, making the room feel as though it lacks usable storage and circulation. STAGING DECISION Move the dresser to an unobstructed wall, keep the closet fully accessible, and simplify the dresser surface. Reads more clearly: both the dresser and closet appear usable without competing for the same floor area. 3 Bed frame — visual weight vs. footprint PROBLEM A bulky bed frame can make a small bedroom feel visually heavy even when the mattress itself fits the room. STAGING DECISION Where
Home Staging for Listing Photos: How to Make Rooms Read Clearly on Camera
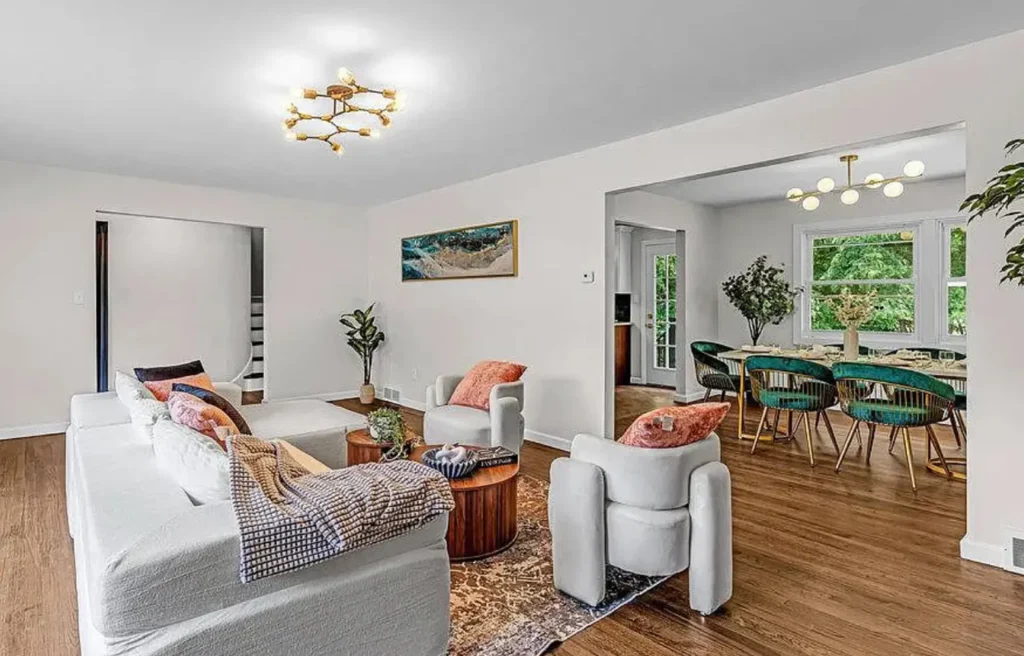
Home LISTING PHOTOS NJ & PHILADELPHIA Home Staging for Listing Photos: How to Make Rooms Read Clearly on Camera A room can look welcoming in person and still read poorly in a listing photo. A photograph flattens a space to one frame—making placement, balance, and focal points far more noticeable. StageIT Staging Team . September 2026 . 10 min read Get Free Estimate KEY TAKEAWAYS If you only read one thing A photo flattens a room, so scale, balance, and focal points matter more on camera. Keep sightlines open and reflective surfaces clear of clutter. Check the room from the likely camera angle before the photographer arrives. Finish staging before the shoot—StageIT stages; the photographer photographs. A room can look welcoming in person and still read poorly in a listing photo. A photograph reduces a three-dimensional room to a single frame, making furniture placement, visual balance, and focal points more noticeable. Staging for listing photos is about helping buyers quickly understand what the room is for, how large it feels, where the main focal point is, and how the furniture and layout work together. The goal is to make the room read clearly from the likely camera angle before the photographer arrives. PURPOSE Show the Room’s Purpose Clearly in the Frame A buyer should be able to quickly understand a room’s purpose from the listing photo. Furniture placement is what communicates that function. A living room should show a clear seating area and focal point, while a dining area should read as a distinct zone rather than blending into nearby spaces. In open-plan homes, use furniture orientation and rug placement to separate living and dining areas visually without adding physical barriers. If a room currently serves several purposes, stage it around one clear primary function for the photograph. The goal is to help buyers immediately understand how the space can be used. SCALE Match Furniture Scale to the View of the Room Furniture can feel comfortable in person but still look too large or heavy in listing photos. From a doorway or corner, oversized pieces may dominate the frame and make the room appear tighter. Focus on: Visible floor area: leave enough open floor around furniture so the room doesn’t feel crowded. Furniture proportions: bulky sectionals, beds, or storage pieces can carry too much visual weight—slimmer profiles or fewer pieces may photograph better. Rug placement: use a rug that clearly anchors the seating area instead of making the arrangement feel fragmented. These decisions should be based on the room’s actual proportions and likely camera angle. There is no single furniture-size rule that works for every property. SIGHTLINES Open Sightlines Without Losing the Layout Listing photos are often taken from positions that capture a broad view of the room, so furniture that crosses the camera’s sightline can make the space feel more crowded or visually confusing. Common sightline problems include: Chairs blocking views into adjoining spaces Tall furniture cutting across the frame and reducing visual depth Unrelated rooms or furniture becoming distracting through open doorways Poorly angled tables or furniture drawing attention away from the room’s focal point Opening sightlines doesn’t mean removing everything. Keep enough furniture to show the room’s purpose and scale, while maintaining a clear visual path from the camera position toward the focal point and far side of the room. Important architectural features—fireplaces, large windows, built-ins, and outdoor access—should also remain visible rather than unnecessarily blocked by furniture. DISTRACTIONS Remove Visual Distractions and Check Reflections In listing photos, anything that pulls attention away from the room can become a distraction. Check the planned camera angle and notice what catches your eye first. Common distractions include: Too many small accessories on counters, shelves, or tables Visible cords and cables Personal items such as family photos or collections Pet items, cleaning supplies, toiletries, or small appliances Competing focal points that make the frame feel visually busy Check reflections from the camera position Mirrors, television screens, glass cabinets, polished surfaces, and windows can capture unexpected details that are easy to miss in person. Before the shoot, check reflective surfaces from the likely camera position and remove or reposition anything that creates visual clutter. ROOM EXAMPLES Four Room Examples: What Changes Before the Camera These StageIT US examples show how furniture scale, room function, focal points, and sightlines can affect what reads clearly in listing photos. EXAMPLE 1 · TOMS RIVER, NJ Showing scale and function BEFORE Large rooms were difficult to judge for scale without furniture, especially in the main living areas. STAGING DECISION Use appropriately scaled furniture to define the living space while keeping enough open floor area for the room’s proportions to remain clear. READS MORE CLEARLY The staged room gives buyers a clearer reference for its size, purpose, and furniture layout. EXAMPLE 2 · BRICK, NJ · WATERFRONT Scale and sightlines BEFORE The waterfront setting was an important property feature, but the interior needed stronger furniture scale and cohesion. STAGING DECISION Use furniture and styling that fit the room’s proportions while keeping the waterfront setting visually connected to the interior. READS MORE CLEARLY The room has a more defined function while important exterior views remain visually connected to the space. EXAMPLE 3 · CREATING A CLEAR FOCAL POINT A bedroom that reads at a glance A staged bedroom should make its primary function immediately clear in the frame. What to notice: The bed acts as the main visual anchor Furniture remains proportional to the room Accessories are restrained rather than competing for attention Visible floor area helps communicate scale The overall arrangement keeps attention on the room rather than individual objects EXAMPLE 4 · SIGHTLINES AND ARCHITECTURAL FEATURES Furniture that supports the architecture A room can photograph more clearly when furniture supports the architecture instead of interrupting important sightlines. What to notice: Furniture remains appropriately scaled The arrangement preserves movement through the room Architectural features
Staging a Ranch Home in NJ: Layout Lessons From Real Local Projects
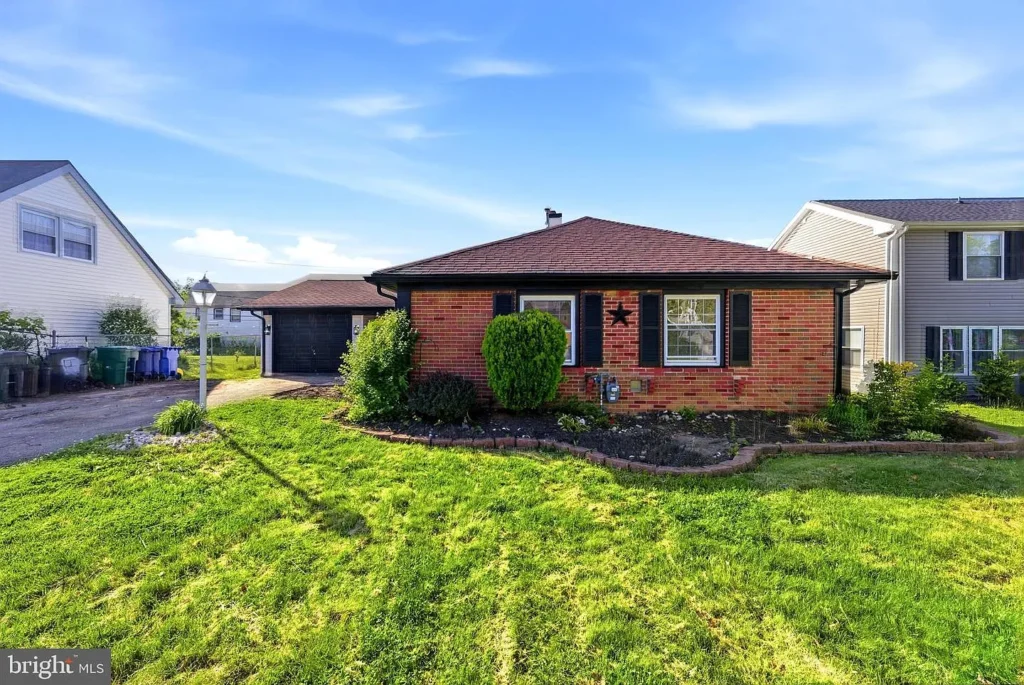
Home RANCH HOMES NEW JERSEY Staging a Ranch Home in NJ: Layout Lessons From Real Local Projects On one level, buyers often see several areas at once from the entry. Staging a ranch home is less about each room alone and more about how the spaces work together. StageIT Staging Team . September 2026 . 10 min read Get Free Estimate KEY TAKEAWAYS If you only read one thing Ranch staging is about how connected spaces work together, not each room alone. Define living and dining zones without blocking the main routes through the home. Start with the actual room connections and circulation, not a generic ranch layout. Two ranch homes in the same town can need very different staging. Many ranch homes organize the main living spaces on one level, and in more open layouts buyers may see several areas at once from the entry. That makes staging a ranch home less about treating each room separately and more about how the spaces work together. Furniture placement should help buyers quickly understand where each area begins and ends, how people move between rooms, which features act as focal points, and how the overall layout reads in listing photos. The goal is to create clear room connections without blocking circulation or making the single-level layout feel crowded. DIAGNOSE FIRST Identify the Layout Challenges in the Actual Ranch Home Ranch homes can have very different floor plans, so staging decisions should start with the actual room connections and circulation rather than a generic ranch layout. Check: Entry view: what does a buyer see first when entering the home? Living and dining connection: are the spaces clearly defined, or do they blend together? Circulation path: does furniture interfere with the route to bedrooms, hallways, or adjoining rooms? Cross-room sightlines: from the entry, can buyers clearly understand the living room, dining area, kitchen, and nearby transitions? Work with the floor plan, not against it These are architectural conditions staging needs to work with. Furniture can clarify zones, preserve pathways, and improve how connected rooms read together, but it cannot change the underlying floor plan. ZONES Define Living and Dining Areas Without Blocking Routes In a connected ranch layout, the goal is to make the living and dining areas feel distinct without interrupting circulation. Focus on: Rug placement: use a rug to define the living zone without extending into the dining area. Furniture orientation: position the sofa to help separate the living and dining areas without creating a barrier. Dining-table visibility: keep the table easy to recognize from the entry or main sightline. Clear circulation: preserve the main walking route between the entry, kitchen, hallway, and adjoining rooms. In smaller ranch homes, avoid over-furnishing both zones just to prove they fit. Too much furniture can make the connected space feel crowded even when each area is technically defined. CONNECTIONS Show How Adjoining Rooms Work Together In a ranch home, several spaces may be visible at once, so adjoining rooms should feel connected without competing for attention. Focus on: Living to dining: arrange furniture so the two zones feel coordinated and avoid blocking important sightlines. Living area to bedroom hall: keep the hallway entrance visible so buyers can easily understand where the private rooms begin. Outdoor access: keep paths to sliders, patios, decks, or backyard access clear and avoid tall furniture that blocks the doorway or view. The goal is to help buyers understand how the main living spaces connect and flow together from one level. PROJECT LESSONS Layout Lessons From Two NJ Ranch Projects WILLINGBORO, NJ · 3-BED / 2-BATH · 1,384 SQ FT · 1961 RANCH Defined, connected rooms on one level This Willingboro ranch project is a 3-bedroom, 2-bath, 1,384-square-foot 1961 ranch. Its before-and-after photos provide a useful visual example for reviewing furniture scale, room function, circulation, and sightlines in a single-level home. What the photos help illustrate: Furniture scale: pieces should define the room without overwhelming the available floor area. Clear room function: buyers should quickly understand how each main space is intended to be used. Open circulation: furniture should preserve natural routes between connected rooms. Sightlines: adjoining spaces and important architectural features should remain easy to see. Transferable lesson Staging should help buyers understand the flow between spaces, not just make each room look finished. Appropriately scaled furniture and clear circulation make the single-level layout easier to read in both photos and walkthroughs. COLTS NECK, NJ · 4-BEDROOM RENOVATED RANCH Anchoring a large open area The Colts Neck project shows a different ranch-home challenge: a large, open renovated living area that needed clearer scale and function. BEFORE Without furniture, the open living area gave buyers little reference for how the space could be used or how its proportions should be understood. STAGING DECISION A defined seating area was used to anchor the open living space while preserving open sightlines and the spacious character of the renovated interior. READS MORE CLEARLY The staged seating area gives the room a clearer function, scale, and layout while keeping the open character of the space visible. Transferable lesson Large open ranch interiors still need clearly defined zones. Furniture should suit the room’s proportions, but not be so large that it interrupts circulation or reduces the openness that makes the layout appealing. WHICH APPLIES? Compare Which Decisions Apply to Your Property The Willingboro and Colts Neck projects show two different ranch-home challenges: defined connected rooms versus a large open living area. Most ranch homes fall somewhere between them, so the staging plan should follow the actual floor plan rather than the ranch label alone. Ranch layout situation What to review Likely staging response Open living/dining area Whether the zones are clear and circulation cuts through seating Use rugs and furniture orientation to define each area while keeping the main route open Separate living and dining rooms Whether each room has a clear function and connects naturally Stage
How to Stage an Awkward Living Room Before Selling Your Home
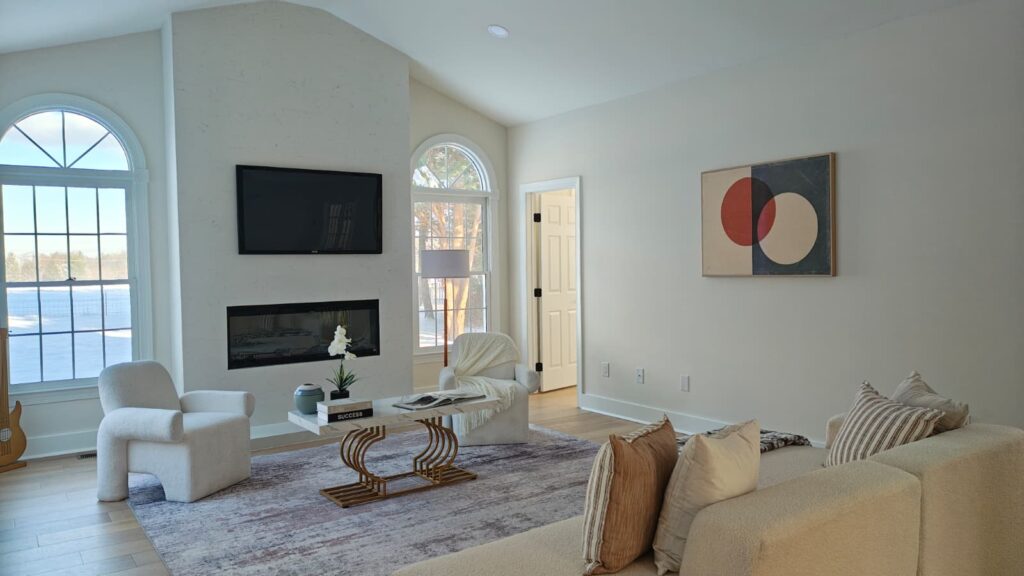
Home ROOM LAYOUT NJ & PHILADELPHIA How to Stage an Awkward Living Room Before Selling Your Home An awkward layout usually isn’t about a lack of space—it’s about how the room reads. Good staging helps buyers see the focal point, understand the function, and move through the space. StageIT Staging Team . September 2026 . 9 min read Get Free Estimate KEY TAKEAWAYS The short version An awkward room is usually a “how it reads” problem, not a lack of space. Choose one main focal point and arrange seating to support it. Separate architectural problems from furniture problems before moving anything. Keep clear routes through the room—buyers should never weave around furniture. An awkward living room layout is not always caused by a lack of space. The problem is often how the room reads. Long proportions, multiple doorways, competing focal points, oversized furniture, or unclear traffic flow can make a room feel confusing in photos and during walkthroughs. Before selling, the goal is not perfect interior design. It’s to help buyers quickly understand where the main focal point is, how the room functions, and how people move through the space. Good staging can help an awkward layout feel clearer, more balanced, and easier to understand. DIAGNOSE FIRST Identify What Makes the Room Difficult to Read Before moving furniture, view the room from the main entry point and the likely listing-photo angle. Most awkward layouts become easier to solve once you identify what is actually causing the problem. Check for: Unclear focal point Does the eye know where to land when you enter the room? Blocked traffic flow Is furniture interrupting the natural path through the room? Competing features Are a fireplace, TV, windows, or other elements fighting for attention? Restricted door swings Do doorways limit where furniture can actually go? Poor furniture scale Are pieces too large, too small, or poorly proportioned for the room? Weak conversation area Do the seating pieces form a clear, functional group? Separate architecture from furniture Staging can improve layout, scale, and circulation, but it cannot move walls, doorways, or fireplaces. When fixed features create the challenge, the goal is to arrange furniture around them more effectively. THE ANCHOR Choose One Main Focal Point A living room should give buyers a clear visual anchor. Without one, even a clean, well-furnished room can feel disorganized. Possible focal points include: A fireplace A natural anchor in many living rooms. A strong window or view Especially where the outlook is a selling feature. Built-in shelving or feature Or another architectural detail worth highlighting. A defined conversation area When no architectural feature clearly dominates. If the room has two competing focal points, choose one as the primary feature based on the room layout and likely listing-photo angle. Keep the secondary feature visible, but arrange the furniture so the room reads clearly around the main focal point. No universal rule There is no universal rule that a fireplace must always dominate or that a television must always be removed. The right choice depends on the room’s geometry, likely photography angle, and overall presentation. CIRCULATION Create Clear Routes Through the Room Home staging traffic flow should make it easy for buyers to enter the living room, reach the seating area, and continue into adjoining spaces without weaving around furniture. Common problems include: Furniture too close to doorways: sofas or chairs shouldn’t interfere with door swings or narrow the entry path. Everything pushed against the walls: this can make the room feel less intentional—a defined conversation area often reads better. Blocked access to windows or outdoor areas: keep clear paths to patios, decks, and important views. Too many competing entry points: in rooms with several doorways, arrange furniture around a central seating area rather than blocking circulation. The test is simple: buyers should be able to move through the room comfortably without feeling that the furniture is in the way. LONG & NARROW How to Stage a Long, Narrow Living Room A long, narrow living room can easily feel like a hallway if the furniture emphasizes the room’s length. The goal is to create one clear seating zone while keeping circulation open. Focus on: One main conversation area: group furniture in the most useful part of the room instead of spreading pieces across both ends. Appropriately scaled furniture: avoid oversized sofas or bulky sectionals that make the room feel tighter. Lighter furniture profiles: slimmer frames or visible legs can help the space feel less heavy. Intentional rug placement: use the rug to define the seating area rather than stretching it across the full length. Clear circulation: keep the walking path beside the seating group, not through it. Reduce the tunnel effect and the room becomes easier to understand in both listing photos and walkthroughs. STAGING PRINCIPLE · LONG, NARROW ROOMS COMPETING FEATURES Handle Competing Fireplaces, Windows and Doorways Rooms with multiple focal points can feel visually unsettled if the furniture tries to face everything at once. The goal is to choose one primary feature while keeping secondary features visible. Use these principles: Choose the strongest focal point: consider what reads best from the main entry and likely listing-photo angle. Orient seating around it: arrange the main sofa or conversation area to support the primary feature. Keep secondary features visible: avoid blocking fireplaces, windows, or architectural details with bulky furniture. Don’t automatically prioritize the TV: let the room’s architecture and presentation guide the layout. Float furniture when wall space is limited: in rooms with several doorways, a central seating group may work better than forcing every piece against a wall. Protect important views: keep sightlines open to significant windows or outdoor features. BEFORE & AFTER LOGIC Compare Layout Options: What Staging Actually Changes One of the clearest ways to understand staging is to compare a specific layout problem with the changes that make a
Renovate or Stage Before Selling in NJ? How to Prioritize Your Pre-Listing Budget
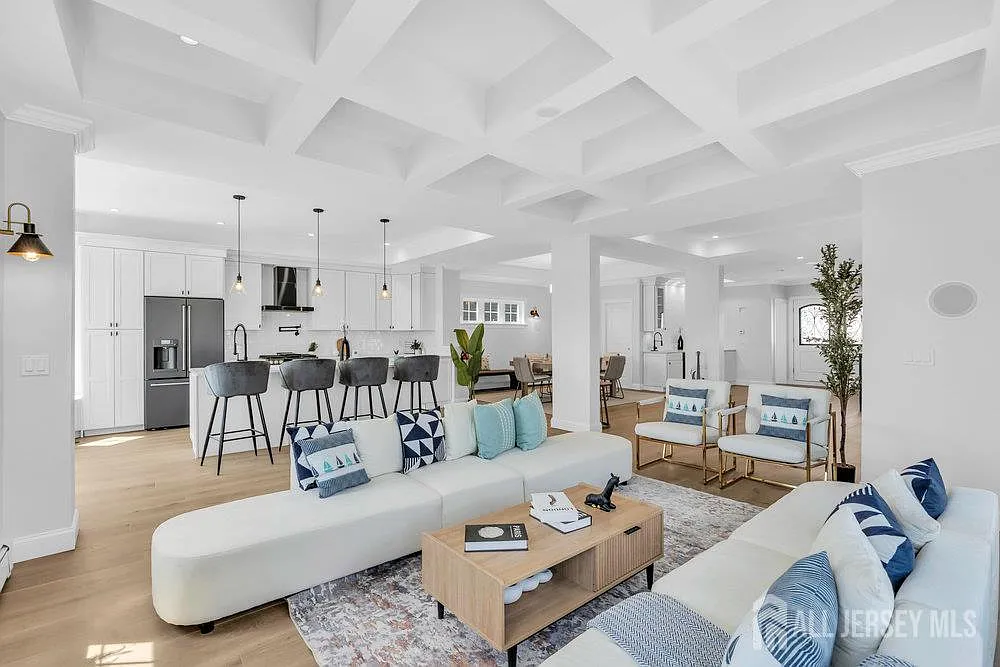
Home PRE-LISTING BUDGET NEW JERSEY Renovate or Stage Before Selling in NJ? How to Prioritize Your Pre-Listing Budget Repair, repaint, renovate, or stage? Each solves a different problem. The first step is identifying what’s actually limiting your property’s presentation—before you spend. StageIT Staging Team . September 2026 . 10 min read Get Free Estimate KEY TAKEAWAYS The short version Repairs, cosmetic updates, staging, and renovation each solve a different problem. Condition first, presentation second—staging never hides a material defect. Separate necessary repairs from presentation choices before spending. Set the photography date first, then work backward to decide what fits. Sellers preparing a New Jersey home for market often ask: should I renovate, repaint, repair, or stage? These options solve different problems, so the first step is identifying what is actually limiting the property’s presentation. Repairs Address defects or maintenance issues—condition problems, not presentation ones. Cosmetic updates Improve dated or worn finishes without a major project. Staging Helps buyers understand scale, layout, and room function. Renovation May be appropriate when a larger improvement is justified by property, market, timeline, and budget. For example, furniture cannot solve active water damage, and fresh paint will not clarify a confusing layout. Likewise, a major kitchen remodel may not be the best use of the pre-listing budget if the main issue is an empty living space that photographs poorly. FIRST PRINCIPLE Separate Necessary Repairs From Presentation Choices If you’re deciding what to fix before selling a house, start by identifying issues that affect the home’s condition, function, or safety. Examples may include active leaks or moisture problems, damaged surfaces, nonfunctioning systems, safety concerns, and other material repair issues. Staging never compensates for condition These are condition problems, not presentation problems. Staging should never be used to hide or compensate for them. Review the property with your listing agent and, when appropriate, a qualified professional licensed where required before deciding how much to spend on presentation. Once necessary repairs are separated out, you can evaluate more flexible presentation issues such as dated but functional finishes, distracting surfaces, rooms that feel empty or difficult to understand, and spaces that don’t photograph well. This distinction keeps the pre-listing budget focused on the right problem. THE DECISION TABLE Repair, Update or Stage: A Decision Table Use this as a starting point, not a universal rule. The right choice depends on the property, listing strategy, budget, and timeline. Property issue Likely first question Most likely category How staging fits Active leak, visible damage, or unsafe/nonfunctional feature Does this need professional repair or assessment first? Necessary repair Stage after the issue has been assessed and appropriately addressed. Worn or distracting paint / finishes Would a limited cosmetic refresh improve presentation? Targeted cosmetic update Stage after the update so the final presentation is consistent. Empty living room or bedroom Can buyers understand scale and function without furniture? Staging / presentation Furniture can show scale, define use, and support photography. Large open-plan area with unclear zones Is the issue the layout, or simply how the space is presented? Usually staging / presentation Furniture placement defines living, dining, and circulation areas. Occupied home with oversized or mismatched furniture Can editing, repositioning, or selective additions solve it? Occupied / hybrid staging Focus on decluttering, editing, and layout before replacing furniture. Dated but functional kitchen or bath Is a major remodel justified by listing strategy, budget, and timeline? Case-by-case Staging can’t change fixed finishes, but it can improve the surrounding presentation. The goal is to identify which type of solution the property actually needs before spending the pre-listing budget. COSMETIC UPDATES When a Targeted Cosmetic Update May Be Appropriate A cosmetic update makes sense when a specific, visible presentation issue can be improved without a major renovation, high cost, or listing delay. Common examples include fresh paint, updated hardware, replaced light fixtures, and minor flooring or surface touch-ups. The better question is whether the issue is noticeable enough to affect how the property presents in person or in listing photos. Before spending, ask: Is the issue clearly visible in photos or during walkthroughs? Does it affect an important room such as the living area, kitchen, or primary suite? Can it be completed within the available budget and timeline? Does the listing agent believe the update will improve the property’s presentation? If a cosmetic update is worth doing, complete it before staging installation. This avoids unnecessary restaging and ensures the furniture and photography reflect the property’s finished condition. LARGER RENOVATION When a Larger Renovation May Be Worth Discussing A larger renovation requires a different decision than a cosmetic refresh. Before committing to major work, consider whether the existing condition is materially affecting the listing strategy, whether comparable properties support the improvement, how long the project will take, and whether the seller can complete it without delaying the planned launch. Discuss the decision with the listing agent using current local market conditions and comparable listings or sales. Also account for contractor availability, permits where applicable, material lead times, and the possibility that the work expands once it begins. Renovation should not be treated as an automatic requirement before selling. SELLER PRINCIPLE · PROPERTY, MARKET, BUDGET, TIMELINE The question is whether the specific improvement makes sense for the property, market, budget, and listing timeline. WHERE STAGING WINS When Furniture and Layout Are the Main Problem Physical home staging is most useful when the main issue is how buyers understand and experience the space, rather than the property’s condition. Common examples include: Vacant rooms: furniture helps show scale, function, and how rooms relate to one another. Open-plan spaces: thoughtful placement can define living, dining, and circulation zones without structural changes. Occupied homes: editing, repositioning, and selective additions reduce visual clutter and improve how rooms photograph. Flex rooms or secondary bedrooms: staging can give an unclear space a more specific and useful purpose. Staging can improve how a property presents in photos and during walkthroughs, but it does
How to Choose a Home Staging Company in NJ: 10 Questions Before You Book
Home CHOOSING A STAGER NJ & PHILADELPHIA How to Choose a Home Staging Company in NJ: 10 Questions Before You Book Two proposals can look similar at first but cover very different scopes, furniture quality, rental terms, and logistics. These ten questions help you compare on more than price. StageIT Staging Team . September 2026 . 10 min read Get Free Estimate KEY TAKEAWAYS The short version A lower-priced proposal isn’t better value if it excludes rooms, terms, or services. Confirm scope, furniture, rental term, extensions, removal, and responsibilities in writing. Give every company the same property details so proposals are truly comparable. Compare on matching scope first—then price becomes much easier to evaluate. Choosing a home staging company in New Jersey should involve more than comparing prices. Two proposals can look similar at first but cover very different scopes, furniture quality, rental terms, and logistics. Before comparing quotes, make sure you understand which rooms are included, what furniture and accessories are provided, how long the rental term lasts, what happens if the listing schedule changes, who handles installation and removal, and who is responsible for damage, access, or other issues during the staging period. A lower-priced proposal is not always a better value if it excludes services or terms included elsewhere. The goal is to compare the full scope of each proposal, not just the final number. BEFORE YOU ASK Start With the Property, Scope and Listing Schedule Before contacting a staging company, gather the basic details of your property. Providing the same information to each company makes it easier to compare proposals fairly. Have these details ready: Property address and town: service areas may vary across New Jersey. Vacant or occupied status: this determines the type of staging service required. Priority rooms: identify the spaces that most need attention. Photography and listing date: helps the company assess scheduling and inventory availability. Access details: parking, elevators, building rules, lockbox access, or security requirements. Primary contact: confirm whether the seller, listing agent, or both will coordinate the project. Using the same property information with each company helps ensure the proposals are based on a comparable scope. For more on what happens before a proposal is prepared, see our home staging consultation guide. THE 10 QUESTIONS 10 Questions to Ask Before You Book Work through these with each company. Grouped in pairs, they move from portfolio and experience through scope, timing, terms, and responsibilities. Questions 1–2 01 Can you show recent projects similar to my property? A general portfolio is useful, but the most relevant examples should reflect a property similar to yours. Look for: Property type: single-family home, condo, townhome, or comparable Occupancy: vacant and occupied staging require different approaches Room mix: projects that include spaces similar to your staging priorities Price point and finishes: staging suited to a comparable market position Recency & consistency: several recent, strong projects beat one standout 02 Do you have experience with vacant, occupied, or hybrid staging like mine? These are different services. Vacant staging supplies and installs a complete furniture and décor package in an empty property. Occupied staging works with the seller’s belongings—editing, repositioning, and selectively adding pieces. Hybrid staging combines existing furniture with selected rental pieces where added scale, style, or function is needed. Confirm experience with your property’s actual condition, not just general staging. Questions 3–4 03 What exactly is included in the staging proposal? A proposal should clearly explain what you’re paying for. Confirm: Rooms included: which spaces are part of the quoted scope Preparation guidance: whether consultation or seller-prep advice is included Furniture and décor: which categories—rugs, lighting, artwork, bedding, accessories—are supplied Delivery and installation: whether transportation, setup, and styling are included Removal: whether pickup is included and under what terms Additional charges: taxes, travel, building or elevator fees, and other logistics costs 04 How is furniture inventory selected for my home? Ask how the company determines which furniture and décor will be used. Inventory should be selected based on room dimensions and furniture scale, architectural style, property condition and finishes, listing price point and positioning, and photography and buyer-walkthrough presentation. Also ask how availability is confirmed and what happens if an intended piece is unavailable—substitutions should still maintain the quality and design direction of the plan. Two proposals with similar prices may include very different services. BUYER PRINCIPLE · COMPARE SCOPE, NOT HEADLINE PRICE Questions 5–6 05 What lead time do you need before installation? Work backward from your planned photography and listing dates. Ask how much notice the company needs and what must be completed first. Typical requirements include: Cleaning and decluttering Any agreed repairs or preparation work Removal of personal belongings Active utilities and confirmed property access 06 How do you coordinate staging with listing photography? Staging should be fully installed and styled before photography begins. Confirm who determines when the property is photo-ready, whether the stager coordinates directly with the photographer, what happens if installation or photography dates change, and whether any styling adjustments are planned after the session. Don’t rely only on advertised turnaround times—confirm the schedule for your specific property, scope, inventory needs, and access. Questions 7–8 07 What rental term is included and how are extensions handled? A quote typically covers a defined rental period, not unlimited staging until the property sells. Confirm the length of the initial term, extension pricing, when extension charges begin, who must approve an extension, and whether extensions are automatic or require written approval. StageIT US currently offers a standard 90-day furniture rental with flexible extensions—confirm the exact term and conditions in your proposal before signing. 08 What are the cancellation, rescheduling and removal terms? Ask how the agreement handles common schedule changes: Listing date moves: what happens if installation must be rescheduled? Property sells early: how is early removal arranged? Rental term expires: what happens if the property is still on the market? Access is
Model Home Staging for NJ Developers and Builders
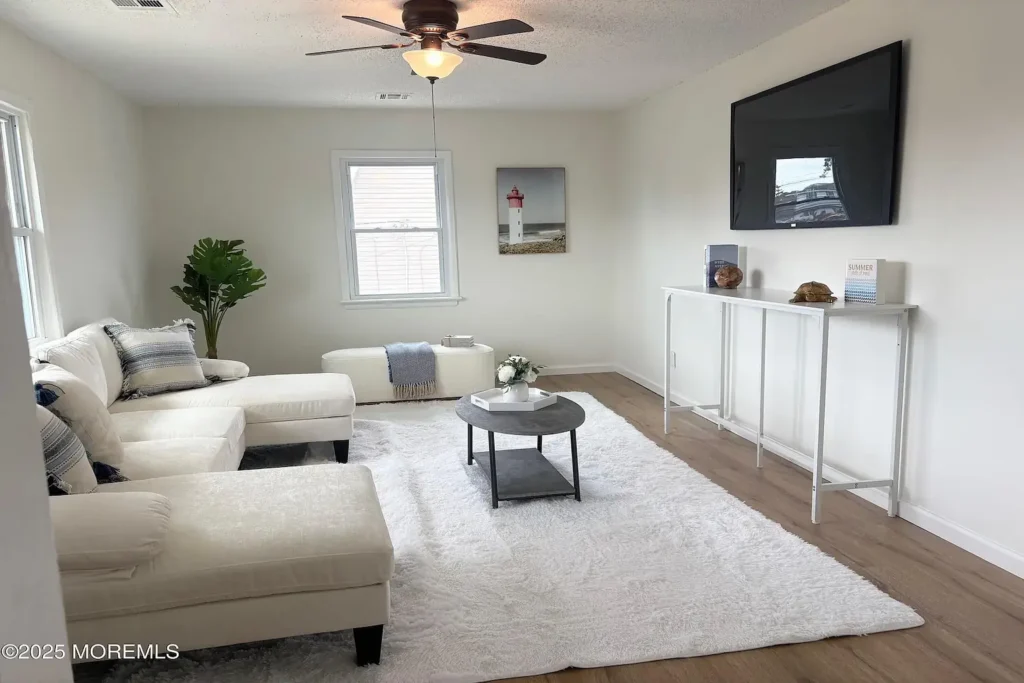
Home FOR DEVELOPERS NEW JERSEY Model Home Staging for New Jersey Developers and Builders A model home may stay in place through repeated buyer tours and multiple marketing cycles. That makes model staging a different process from standard resale staging. StageIT Staging Team . August 2026 . 10 min read Request a Proposal KEY TAKEAWAYS The short version Model staging supports repeated tours and marketing—not a single transaction like resale. Long-term installs require defined terms for access, upkeep, extensions, and removal. You don’t need to stage every unit; scope to the plans buyers most need help reading. Involve staging before the install date—coordinate with construction and sales timelines. Model home staging furnishes and styles a model unit, showcase home, or spec property so buyers can better understand the floor plan, scale, finishes, and intended use. For New Jersey developers and builders, this is more than an aesthetic choice. A model home may stay in place through repeated buyer tours and multiple marketing cycles, so the furnishings need to coordinate with builder finishes, support the sales team during walkthroughs, hold up to repeated use, and continue looking polished in marketing photos. That makes model home staging a different process from standard resale staging. NOT RESALE STAGING Why Model Homes Need Different Staging Than Resale Properties Resale staging is usually temporary and focused on helping buyers understand one property during a sale. Model home staging serves a broader purpose. A model may remain active through an entire development sales phase, with repeated walkthroughs, sales-team use, and ongoing marketing photography. The furnishings therefore need to be durable, consistent with the builder’s finishes, and aligned with the development’s positioning. One sale Resale Staging Development Model Home Staging Purpose Present one property for sale Represent a floor plan and product across repeated tours Typical use Listing photos and showings Photography, unit tours, and sales support Installation Usually removed after the sale May remain throughout a longer sales phase Design focus Property-specific presentation Floor plan, finishes, price point, and positioning Coordination Seller and listing team Construction readiness, access, sales team, ongoing upkeep Model home furniture also needs to demonstrate how the floor plan functions and support sales conversations in the space. The goal isn’t simply to make rooms attractive, but to present the development consistently and clearly. WHAT IT ACHIEVES What a Staged Model Unit Achieves for a Development Empty new-construction spaces can be difficult for buyers to interpret. Without furniture, room scale, circulation, and the practical use of open-plan areas may not be immediately clear. Physical model home staging helps buyers understand the space during a walkthrough by: Showing furniture scale Demonstrates how seating, dining, and bedroom furniture fit within each room. Defining open-plan zones Clarifies how living, dining, and kitchen areas work together. Supporting positioning Connects the architecture, finishes, and furnishings into one consistent presentation. Improving marketing Provides a furnished setting for photography, brochures, and digital marketing. Supporting sales conversations Gives the sales team a consistent environment for buyer tours. Differentiating models Helps distinguish floor plans or finish tiers when multiple model units are used. WHICH UNITS Choosing Which Units to Stage Developers don’t automatically need to stage every available unit, every floor plan, or every phase. The right scoping decision depends on which spaces buyers need the most help interpreting and where a physical furnished reference actually changes how the product reads. Development situation Scoping direction One primary floor plan One strong model may be sufficient if it represents the product accurately and the sales team can show it effectively. Several materially different plans Consider staging the plans buyers most need help interpreting—not every plan automatically requires a full model. Different finish or price tiers A separate installation may be appropriate when product positioning materially changes between tiers. Phased development Reassess when later phases introduce different plans, finishes, or priorities the existing model no longer represents. Spec home or single build Treat as a property-specific staging project rather than a long-term model program—see the spec-home section below. For condo or multi-unit developments, prioritize models that clearly represent typical room scale, circulation, and the floor plans buyers most need help interpreting. The largest or most expensive unit is not automatically the most useful model. MARKET POSITION Matching the Staging to the Development’s Market Position The staging direction should reflect the property itself—its price point, architecture, finishes, floor plan, location, and intended use—rather than assumptions about buyer demographics. Premium waterfront homes may call for elevated materials, larger-scale furniture, and a more refined finish relationship; compact condo models may benefit from smaller-scale furniture, clear storage solutions, and flexible layouts that show how the space functions. Neutral staging does not need to feel generic—it should create a clear identity that supports the development’s positioning. MODEL PRINCIPLE · POSITIONING For luxury developments, premium furnishings, curated art, and higher-end materials should complement the architecture and finish package rather than compete with them. LONG-TERM INSTALLS Long-Term Installations: What Model Projects Require The biggest operational difference between resale and model-home staging is installation duration. Resale staging usually lasts through a transaction window, while a model home may remain furnished throughout an entire sales phase. Long-term model projects should clearly define: Installation term: how long the quoted period covers Extension terms: who approves extensions and how pricing is handled Access: who can enter the model and under what notice or scheduling rules Damage and insurance: responsibility for loss, damage, or coverage Maintenance and substitutions: how worn or damaged pieces are handled Inventory use: who may move or use furnishings during the installation Photography rights: when images are taken and how they may be used Removal terms: what triggers removal and how much notice is required Not just standard staging left longer Furniture selection, installation, access, and upkeep should reflect the actual duration and repeated use of the model. If the developer prefers to purchase furniture or use a hybrid arrangement, confirm that StageIT US supports that option for the specific project before presenting it as an available service. COORDINATION Coordinating With Construction and
Short-Term Rental Staging: A Guide for NJ Airbnb Owners
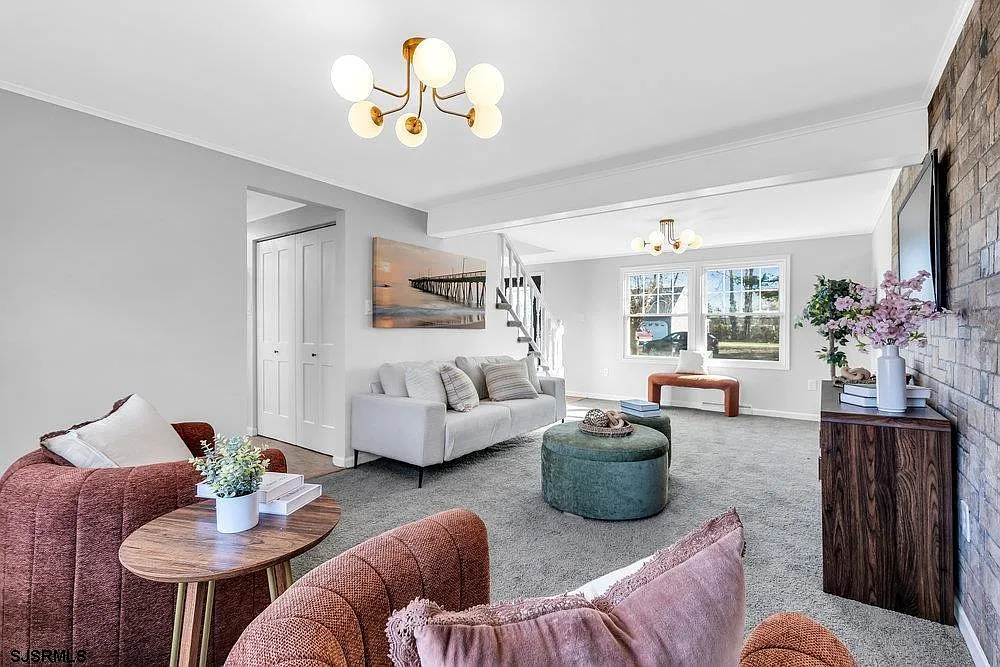
Home AIRBNB STAGING JERSEY SHORE & NJ Short-Term Rental Staging: A Guide for New Jersey Airbnb Owners A short-term rental has to do two things well: look appealing in listing photos and withstand repeated guest stays and turnovers. Good staging balances both. StageIT Staging Team . August 2026 . 10 min read Get Free Estimate KEY TAKEAWAYS The short version Rental furniture is part of ongoing operation—not temporary like sale staging. Jersey Shore rentals benefit from a shoulder-season refresh, not just a summer look. Durability and guest capacity matter as much as how a room photographs. Furniture can be purchased, rented, or a hybrid—chosen to fit the property and plan. A short-term rental needs to do two things well: look appealing in listing photos and withstand repeated guest stays and turnovers. Effective short-term rental staging balances both. This guide is for new hosts furnishing and staging a rental for the first time, and existing hosts refreshing a property that feels dated or no longer photographs well. Whether the property is at the Jersey Shore or elsewhere in New Jersey, furniture, layout, durability, and photography should work together to create a space that’s attractive, practical, and guest-ready. NOT THE SAME AS SELLING Why Rental Staging Is Different From Selling a Home Traditional home staging is temporary—furniture is selected to help buyers understand a property during the sales process, then removed once the staging period ends. Short-term rental staging is different because the furniture becomes part of the property’s ongoing operation. It needs to look good in photos while also handling repeated guest stays, cleaning, luggage, children, pets where allowed, and seasonal wear. Resale Sale Staging Rental Short-Term Rental Staging Primary goal Help buyers understand the property Help guests evaluate and comfortably use the rental Audience Prospective home buyers Short-term guests Duration Temporary Ongoing Durability Lower priority High priority Photography Supports one property sale Supports ongoing booking decisions Operational needs Limited Storage, turnover flow, seating, luggage space, guest capacity For rentals, the best setup balances presentation, durability, and day-to-day functionality. PHOTOS DRIVE BOOKINGS How Listing Photos Drive Booking Decisions Guests often scan short-term rental listings quickly, so the first few photos should clearly communicate the property’s style, scale, sleeping capacity, and overall feel. Good photography preparation usually includes adjusting furniture placement, reducing surface clutter, improving lighting, hiding cords and owner items, and making sure each room photographs clearly and consistently. Listing photos should accurately reflect how the property will actually look when guests arrive. RENTAL PRINCIPLE · HONEST PRESENTATION Keeping the space aligned with its photos also matters over time. If furniture changes, pieces wear out, or the style drifts, update the setup or refresh the photography. Furniture scale and layout should also be resolved before the photo shoot—a well-proportioned room is easier to photograph and easier for guests to understand. BUILT TO LAST Furnishing for Durability and Turnover Short-term rental furniture needs to look good and hold up through repeated guest stays and cleaning. Key priorities include: Performance fabrics & wipeable surfaces Materials that handle spills, moisture, and frequent cleaning without sacrificing appearance. Sized for guest capacity Seating and dining arrangements that match the number of guests the property accommodates. Replaceable, maintainable pieces Washable covers, durable rugs, and components you can repair or replace without redoing the whole setup. Luggage & storage space Practical places for bags, beach gear, coats, and other guest belongings. Simple bedding systems Bedding that’s easy for cleaners to reset consistently between stays. Furniture ownership model Decide whether renting, purchasing, or combining both makes the most sense for the property. The goal is a setup that remains attractive, functional, and easy to maintain well beyond the initial installation. JERSEY SHORE Staging the Jersey Shore Shoulder Season For Jersey Shore rentals, summer may be the peak season, but autumn and winter may attract weekend travelers, remote workers, family visitors, and small groups. A property styled only for summer can feel too seasonal later in the year. A focused refresh can make the space feel more comfortable year-round without a full refurnish. Consider: Warmer textiles: throws, layered bedding, and comfortable seating while keeping the coastal character. Flexible dining and work areas: spaces useful for both meals and remote work. Better entry storage: room for coats, shoes, and off-season gear. Layered lighting: table and floor lamps to compensate for shorter days. Year-round coastal styling: pieces that still feel appropriate beyond beach season. Shoulder season is also a good time to inspect high-use items such as outdoor cushions, linens, and kitchen accessories and replace anything showing noticeable wear before the next busy period. FIRST IMPRESSIONS Which Spaces Guests Judge First Guests use listing photos to quickly understand whether a rental fits their needs. The most important spaces should answer practical questions clearly. Main living area Show the property’s style, scale, and how many guests can gather comfortably. Sleeping spaces Make bed size, sleeping capacity, and overall comfort easy to understand. Kitchen & dining Show cooking functionality and whether dining space matches the expected group size. Bathrooms Present a clean, well-maintained, functional space. Entry & mudroom Especially at the Shore, provide practical space for shoes, bags, and seasonal gear. Outdoor or view areas If these are a major feature, present them clearly in the listing photos. Review each image from a guest’s perspective. If a photo leaves basic questions about size, function, or capacity unanswered, the staging or photography may need attention. AVOID THESE Common Mistakes in Short-Term Rental Furnishing The biggest furnishing mistakes usually come from designing for appearance without considering how guests will actually use the property. Overdoing the beach theme: use a cohesive coastal style instead of novelty décor that quickly feels dated. Ignoring guest capacity: seating and dining should match the number of guests the rental accommodates. Choosing fragile pieces: avoid furniture and accessories that are hard to clean, maintain, or replace. Mixing unrelated styles: keep the look consistent across rooms so the property feels intentionally designed. Buying before planning the layout: decide on placement and scale before purchasing pieces. Creating a setup
Do Real Estate Agents Pay for Staging?
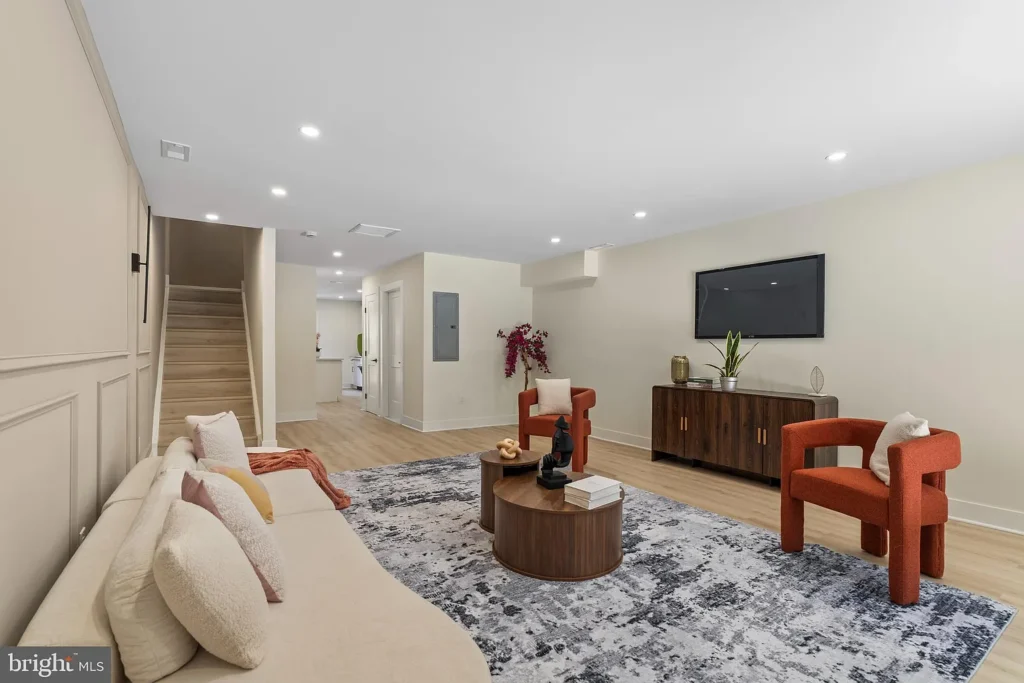
Home FOR AGENTS NJ & PHILADELPHIA Do Real Estate Agents Pay for Staging? What NJ Agents Should Know Sometimes—but it isn’t a standard requirement. The more useful question for agents is when contributing to staging makes strategic sense, and what to agree on before staging begins. StageIT Staging Team . August 2026 . 9 min read Partner With Us KEY TAKEAWAYS The short version Sellers commonly pay; agent contribution is a business decision, not an industry obligation. Never assume pay-at-closing—confirm the staging company specifically offers it. The key distinction is a defined, capped contribution vs. covering unlimited staging costs. Whoever pays, start with a written estimate so scope, term, and cost are clear. Do real estate agents pay for staging? Sometimes—but it isn’t a standard requirement. In New Jersey and the Philadelphia area, sellers commonly pay because staging is part of preparing their property for market. However, some agents or brokerages may choose to contribute toward staging costs, cover a specific staging service, or include staging within a broader listing-marketing plan. These arrangements are based on the individual listing and agreement, not an industry-wide obligation. For agents, the more useful question is when contributing to staging makes strategic sense and what should be agreed on before the staging begins. WHO PAYS Who Typically Pays for Home Staging? In most cases, the seller pays because staging is part of preparing the property for market. But the person recommending staging, approving the scope, signing the agreement, and paying the invoice may not always be the same. Seller pays Seller approves the scope and pays the full invoice. Agent contributes Agent or brokerage covers a defined service or portion of the cost. Shared cost Agent and seller divide the expense by an agreed amount or percentage. Included in a marketing plan A specific staging service is included in the agreed listing-marketing plan. For a broader explanation of payment arrangements, see the seller-focused guide on who typically pays for home staging. The rest of this article focuses on when an agent contribution may make sense and what should be agreed before staging begins. WHEN IT MAKES SENSE When Agents Choose to Cover Staging Costs Agent-funded staging is a business and marketing decision, not a standard obligation. It may make sense when the contribution is clearly defined and tied to the needs of a specific listing. Common situations include: Part of a consistent marketing plan: the agent coordinates a consultation, covers a defined staging service, or offers a fixed contribution as part of the listing strategy. Established relationship with a stager: repeat partnerships make pricing, scope, and workflow easier to predict. The presentation issue is significant: vacant or poorly defined rooms may need furniture to communicate scale and function clearly. The contribution is capped: the agent covers a specific service or amount, while the seller pays for anything beyond that scope. The key distinction is between a defined contribution and agreeing to cover unlimited staging costs. AGENT PRINCIPLE · CONTRIBUTION CAPS Any cap, room scope, or service included should be agreed in advance and aligned with the brokerage’s marketing-expense policy. SELLER-PAID When the Seller Pays Directly Seller-paid staging is the more common arrangement because staging prepares the seller’s property for market. But that doesn’t mean the agent is uninvolved. Agents can still support the process by: Recommending a trusted staging company Helping prioritize the rooms that matter most for photos and buyer perception Coordinating staging with photography and the listing launch Reviewing the proposal so the seller understands scope, rental term, extension terms, and removal Recommending and coordinating staging is part of the agent’s service. Paying for it is a separate business decision. For more on pricing, see the New Jersey home staging cost guide. SHARED COST Splitting the Cost: How Shared Arrangements Work Shared staging costs can work well when the agent and seller agree on the details before installation. Before contributing, it’s worth working through six questions: SHOULD THE AGENT CONTRIBUTE? Six questions to ask first Will staging solve a real presentation issue—vacant rooms, poor scale, or unclear function? Is the staging scope specific enough to set a contribution limit? Is the agent’s contribution capped in writing? Who pays if the rental period needs to be extended? Does the contribution fit the agent’s marketing budget and brokerage policy? Has the staging company confirmed the invoice recipient, payment timing, and cancellation terms? Shared arrangements can take different forms—a fixed amount with the seller covering the balance, a defined key-room service with the seller paying for additional rooms, or a percentage split of an approved total. Whatever the structure, document who pays what, who approves additional costs or extensions, and what happens if installation dates or scope change. PAY AT CLOSING? Paying at Closing: Is It an Option? Sometimes—but only if the staging company specifically offers a deferred or closing-linked payment arrangement. Never assume staging can be paid at closing. Before agreeing to this structure, confirm whether deferred payment is actually available, who owes the invoice if the listing doesn’t close, how rental extensions are handled before closing, when removal occurs, and whether the seller’s attorney or closing professional should review the arrangement. Confirm StageIT US’s current policy first For StageIT US, confirm the current payment policy directly before presenting a pay-at-closing option to a seller. An accepted offer does not automatically end the staging period—rental charges or other obligations may continue until the agreed removal terms are satisfied. IN THE LISTING How Staging Fits Into a Listing Presentation Agents should be specific about what “staging included” actually means. A vague promise can create expectations that don’t match the service being offered. Common approaches include: Consultation coordinated: the agent arranges a professional consultation so the seller understands the recommended scope before deciding on installation. Defined contribution: the agent offers a fixed amount toward staging or a specific service. Preferred staging vendor: the agent recommends StageIT US and coordinates the process without funding it. Seller-paid with agent coordination: the seller pays, while the agent manages